
In the summer months, iced coffee is a regular hot-weather staple. Cold-brewing your own coffee instead of just adding ice to a hot-brewed cup is a real treat. But why stop with just adding ice?
You can jazz it up with the addition of cold foam — and it will work great with various cold brew coffees and other iced coffee, such as iced cappuccinos and iced lattes!
Cold foam is an excellent topping for iced coffee, thanks to its light, airy texture that will give your coffee brew a cool finish.
The foam is similar in texture and consistency to whipped cream, and you can make it at home. Here are five ways to make amazing foam at home.
What is cold foam?
Cold foam is a textured and stiff foam made from low-fat milk. This milk gives off the best foam and holds the most texture. You can find the foam in various cold brew drinks and other iced coffee drinks.
The foam is almost velvety in texture when done right, and that’s why I want to show five ways to make it at home.
I think after reading through the list of ways to make cold foam at home, you’ll have at least one option to make some yourself.
It’s a great way to spice up cold brew coffees and other iced coffees. But more on this later.
The best milk to use for cold foam
Have you ever wondered how to make this foam at home?
Whether you’re looking for a new recipe for iced coffee or you’re bored of the standard chocolate syrup or cream topping on your latte, cold foam has got to be on the top of your list.
The foam is easy to make at home — just make sure you use authentic ingredients.
The best milk to use when making the foam is 2% fat milk or low-fat milk. These types of milk have the ability to produce high-volume and long-lasting tiny milk bubbles that make cold foam so great.
Think of it like this, the more air you create in the milk, the more bubbles the milk produces. This will result in a super fine and velvety textured cold foam that is just amazing on top of various iced coffee drinks.
Using half & half or heavy cream instead of low-fat milk is when you want to treat yourself after a hard day’s work. Using half & half or heavy cream will give you an even richer and creamier foam that is absolutely amazing.
Most air bubbles like to trap themselves in a thicker, fatter kind of milk, and this is why making the foam with half & half, or just heavy cream, will work great and taste even more amazing than using non-fat milk.
Let me tell you a bit about the different options you have to make the cold foam yourself. I’ve listed five ways to make cold foam at home, all using other techniques down below:
1. How to make cold foam with a blender
To make this fluffy cold foam at home, the fastest way to do so is by using a blender. It blends super fast and will have your foam ready in no time.
This is the best way when making a big batch of this stuff. To make it, you’ll need:
- Blender of choice
- 1 cup (0.24 l) of low-fat milk

You can always add more milk to the blender at once or less if you don’t need so much.
To get started with making cold foam with a blender, follow the steps listed below:
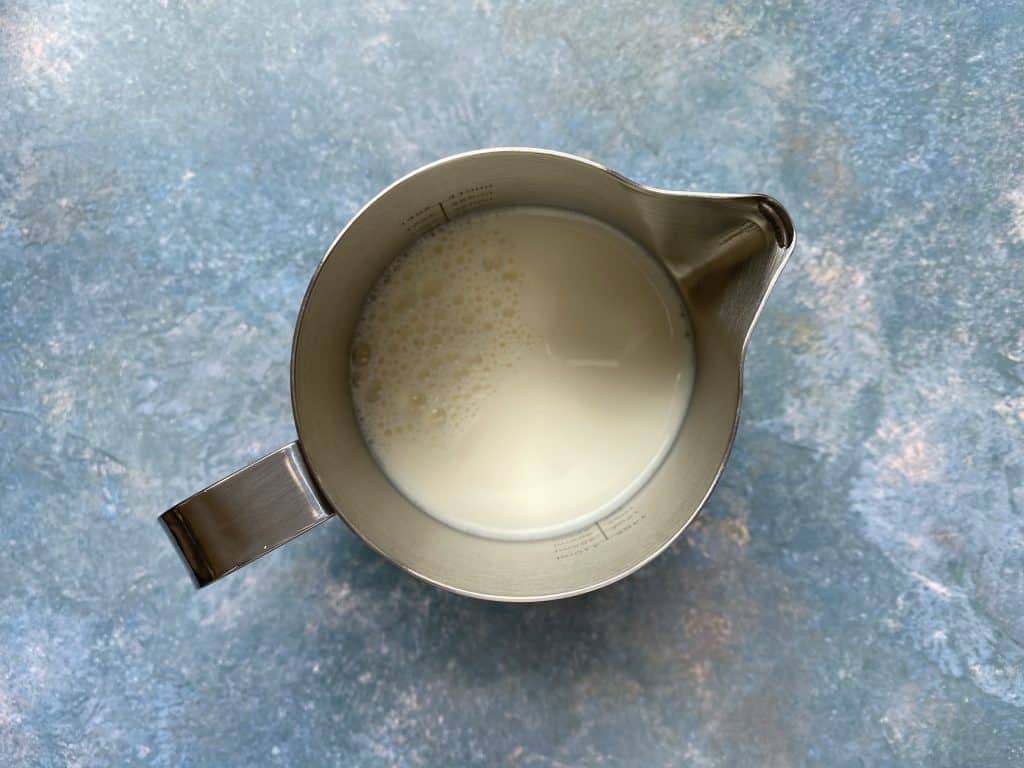
- Pour the cold milk into your blender cup.
- Place the milk-filled blender cup onto your machine.
- Slowly increase the speed of the blender blades until it’s at full speed.
- The more volume, the better your foam will turn out.
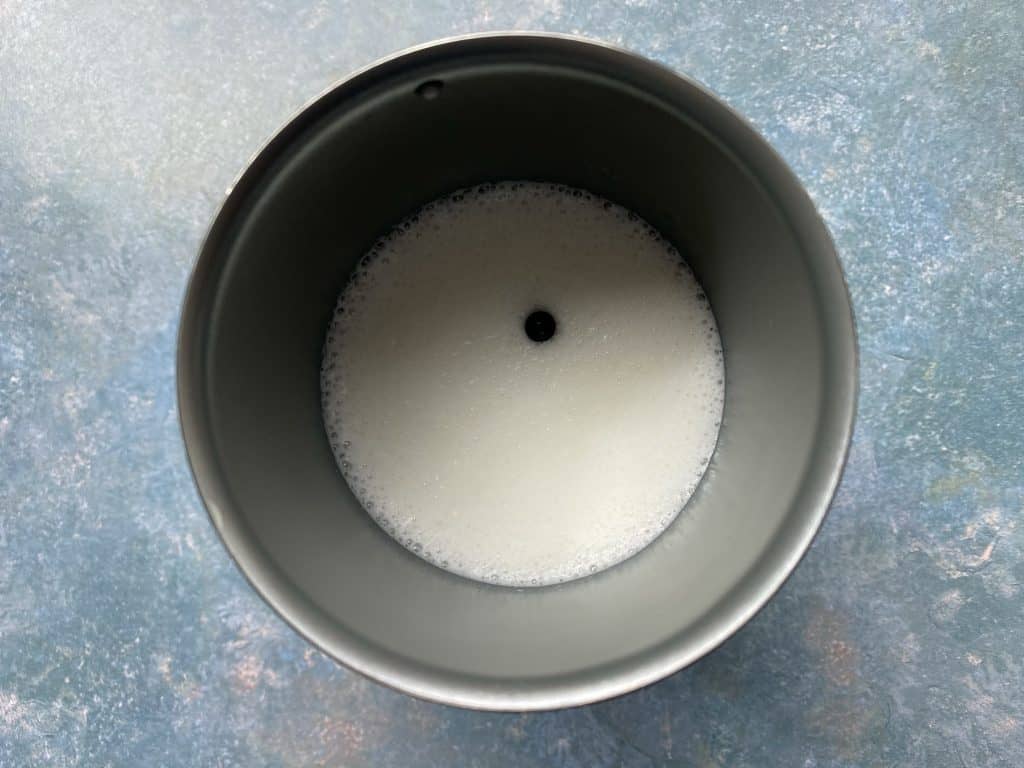
- Once fluffy and smooth, remove the milk from the blender cup.
You can now use your foam how you see fit. Don’t forget to clean the blender cup after you’ve used it.
Now that I’ve covered how to fluff the milk using a blender, let’s move on to making it using a handheld mixer:
2. Making cold foam with a handheld mixer
The handheld mixer is an alternative to the big blender. This technique will work great when you plan on making a smaller batch.
You shouldn’t have to make the blender all dirty for just one cup of iced coffee, right? You’ll need:
- Handheld mixer
- A small bowl or mixer attachment to store the milk
- 1/2 cup (0.12 l) of low-fat milk

You can use any bowl or cup that you see fit; sometimes, a cup is included when buying a handheld mixer.
I suggest using this attachment if you have it. To make the foam:
- Pour the cold milk into the bowl of your choice.
- Place the handheld mixer into the milk-filled bowl.
- Start on low speed, as you want to avoid splashing milk all over your kitchen counter.
- Slowly increase to a higher speed as the milk will foam up more.
- Once fully foamed, remove the mixer from your milk, and you are ready to go!
Top those delicious iced coffees with your homemade fluffy cold foam, and don’t forget to clean your equipment. Now, for the easiest way to make cold foam yourself:
3. Cold foam made with a milk frother
If you have a milk frother at home, like a Nespresso attachment to your coffee machine, or an independent milk frother like the Aerocinno 4, you’ll have cold foam in no time.
I happen to have a Nespresso machine with the milk frother attached, but it’s totally fine to use a different milk frother for this technique.
You’ll need the following equipment to get started:
- Milk frother with cold foam option
- 1/2 cup (0.12 l) of low-fat milk
Most milk frothers have the option to cold foam the milk, which is exactly what you’re looking for.
If your milk frother doesn’t have this option, it’s best to use another cold foam technique. To start:
- Pour your cold milk into the milk frother compartment.
- Usually, there’s a line in the milk frother that shows you how much liquid can be added. If you go over this line, the milk that comes out will not be the best, so make sure you stay under this line.
- Press and hold the button for a few seconds until the little light turns blue if you’re using a Nespresso milk frother. This indicates that you’re making the cold foam with the right setting.
- Let the machine do its work and wait until it’s finished. You are left with perfectly fluffy milk.
This technique is amazing when you want to quickly make some cold foam to top your cold brew with, like this cold brew latte.
Tip: Did you know you can make amazing iced coffee using Nespresso pods at home? I’ve written an in-depth article about making this coffee at home. You can check it out here.
How do you make cold foam without a frother?
Although there are plenty of options to make the foam at home, you can’t beat making it with a frother.
If you don’t have a frother at home, or you don’t feel like using it, you can use these techniques instead.
You can make cold foam at home without a frother by using a French press or shaking the milk with a resealable jar.
I’ve listed both options for making the foam down below so you can check them out.
4. Making cold foam with a French press
This is the first of two techniques that don’t require a frother. It uses a French press coffee brewer instead.
It goes to show that a French press is very versatile. To make the foam with a French press, you’ll need:
- A French press
- 1/2 cup (0.12 l) of low-fat milk

The amount of milk listed above makes a good amount of cold foam to start with. It will be enough for two cups of iced coffee.
If you plan on making more cups of coffee, you can up the amount of milk used:
- Place the cold milk into a clean French press beaker.
- Add the plunger on top and press down.
- By pressing up and down on the French press plunger, you start creating tiny air bubbles.
- Keep going until a nice thick frothy milk layer starts to form. It usually takes between 30 and 45 seconds for me, but this will all depend on the amount of milk you plan to make.
Did you know you can also use this technique with hot milk? You can froth the hot milk and use it to finish your Café au Lait.
Also, don’t forget to clean your French press afterward thoroughly. I’ve written an article where I show you four ways to clean your French press in 60 seconds or less.
5. Making cold foam with a jar
If you don’t have any of the equipment mentioned above, you can also make cold foam using a resealable jar. For example, you can use a mason jar for this technique.
You could even use a resealable storage jar like I’m using. Or an empty jam jar that you’ve cleaned thoroughly. It doesn’t have to be the prettiest to work.

You’ll need the following equipment and ingredients to get started:
- Resealable jar of choice
- 1/2 cup (0.12 l) of low-fat milk
The best part about using this jar is that you can easily scoop the foam from the jar and not have to transfer it from, say, your blender to a good cup to use it properly.
To make the foam using this technique, follow the steps below:
- Pour the cold milk into your jar.
- Close the lid.
- Start shaking vigorously until a lot of foam starts to form. I found that this is around the minute mark.
- Once fully fluffed, you can remove the lid from the jar and start using your freshly made foam!
This is the easiest way to make cold foam at home. And you can use it to make so many delicious coffee drinks, especially iced coffees. It’s simply amazing!
Cold Foam: 5 Ways

Making cold foam at home is fun. You can choose one of these five techniques to make this delicious coffee add-in yourself!
Ingredients
- 1/2 cup (0.12 l) of 2% fat milk
- Or 1/2 cup (0.12 l) of other low-fat milk
Instructions
Cold foam with a blender:
- Pour milk into a blender cup.
- Place the blender cup onto your machine.
- Turn on the machine and slowly increase the blade speed until at full speed.
- Once fluffy and smooth (about two minutes), your cold foam is ready to use.
Cold foam with a handheld mixer:
- Pour the milk into a bowl of choice.
- Place the handheld mixer into the bowl.
- Start on low speed and increase to a higher speed slowly.
- After one minute, the cold foam is ready to be used.
Cold foam with a milk frother:
- Pour the milk into your milk frother.
- Press and hold the button until the cold foaming starts.
- Let the milk frother do its thing. Once it's finished, you're left with a thick, cold foam!
Cold foam with a French press:
- Place the milk into a clean French press beaker.
- Add the plunger on top.
- Start pressing up and down with the plunger.
- Keep foaming for about 30 to 45 seconds; after that, you're ready to use your cold foam!
Cold foam with a jar:
- Pour the milk into a resealable jar of choice.
- Close the lid and start shaking vigorously.
- After about a minute, you'll see thick cold foam forming, and you're ready to use it!
Notes
You can also use one of these techniques with your favorite dairy-free alternative!
Nutrition Information:
Serving Size:
1Amount Per Serving: Calories: 61Total Fat: 2.4gSaturated Fat: 1.5gUnsaturated Fat: 0.6gCholesterol: 10mgSodium: 50mgCarbohydrates: 5.7gSugar: 6.1gProtein: 4g
How to use cold foam at home
You can use cold foam on various cold brew coffees as you see fit, but you can also use it on top of flavored iced coffee. The foam is a substitute for adding milk or a milk alternative to your coffee.
The foam lies on top of the coffee instead of pouring it in and mixing it up. It will create a different mouthfeel and will taste amazing.
If you have just made the cold foam with one of the techniques listed, I’m sure you’ll want to try it out.
I’ve listed a few cold coffees that will taste great with the addition of the foam and are the homemade versions of what you’d get at Starbucks:
I suggest using the foam instead of adding milk to your coffee. As the foam is made of milk, you don’t want to double the amount used because this will only dilute your iced coffee drink.
If you’d like to try a cold foam that uses vanilla syrup (or vanilla extract) as a sweetener, you can check out the vanilla sweet cream cold foam recipe here.
This cold foam version from Starbucks can be made in the exact same way I’ve shown you in this article, making it easier for you to try new flavors.
More coffee add-ins to try
Ready to upgrade your daily coffee?
Here are some coffee add-ins to try today:
- Baking Soda in Coffee
- Brown Sugar in Coffee
- Buttermilk in Coffee
- Cocoa Powder in Coffee
- Cinnamon in Coffee
- Condensed Milk in Coffee
- Dark Chocolate in Coffee
- Heavy Cream in Coffee
- Honey in Coffee
- Olive Oil in Coffee
- Powdered Sugar in Coffee
- Vanilla Extract in Coffee
And for even more options, check out the coffee add-ins hub here!
Conclusion
It’s amazing what you can achieve with an ingredient as simple as milk. Milk is already a great addition to any iced coffee, in my opinion, but this foamy goodness wins it all.
I went over five techniques that you can use to make some of this amazing foam at home. So I hope that just one technique works great for you to get started on making it yourself.
If you want to learn more about coffee, you can check out the articles below. I’ve listed a few articles that might be of interest to you.
Have you tried cold foam before? Let me know by leaving a comment down below. If you have any other questions regarding coffee, you can also contact me directly by pressing the “Contact Me” button at the top!
")


